In this series of posts I run through the process I used to create this blog and host if for free, using VS Code, Hugo, Github and Azure Static Websites.


-
Part 1 - Create a Github repository and create a local Hugo web site. (This Post)
-
Part 2 - Configure the Hugo website
- the config,
- creating content and pages,
- configure google analytics,
- configure Disqus for comments,
-
Part 4 - Configure more advanced Hugo configuration
- configure mermaid for diagramming,
- configure Algolia for search,
- configure and create partials
- modify social links,
What you will need:
- Visual Studio code with the Frontmatter extension for creating and publishing content.
- A [Github Account - to host the files.
- Hugo - Open source Static Website Generator
- An Azure subscription, Azure Static Websites is one of many free services, to serve the site. (with free SSL)
Step 1 - Setup a Github Repository
Login in to Github and create a new repository, give it a simple name with no spaces, in the example below the site is configured as follows:
| Name | Visibility | Add a readme | Add .gitignore | Add licence |
|---|---|---|---|---|
| statto-blog | Private | true | node | Creative Commons v1 |
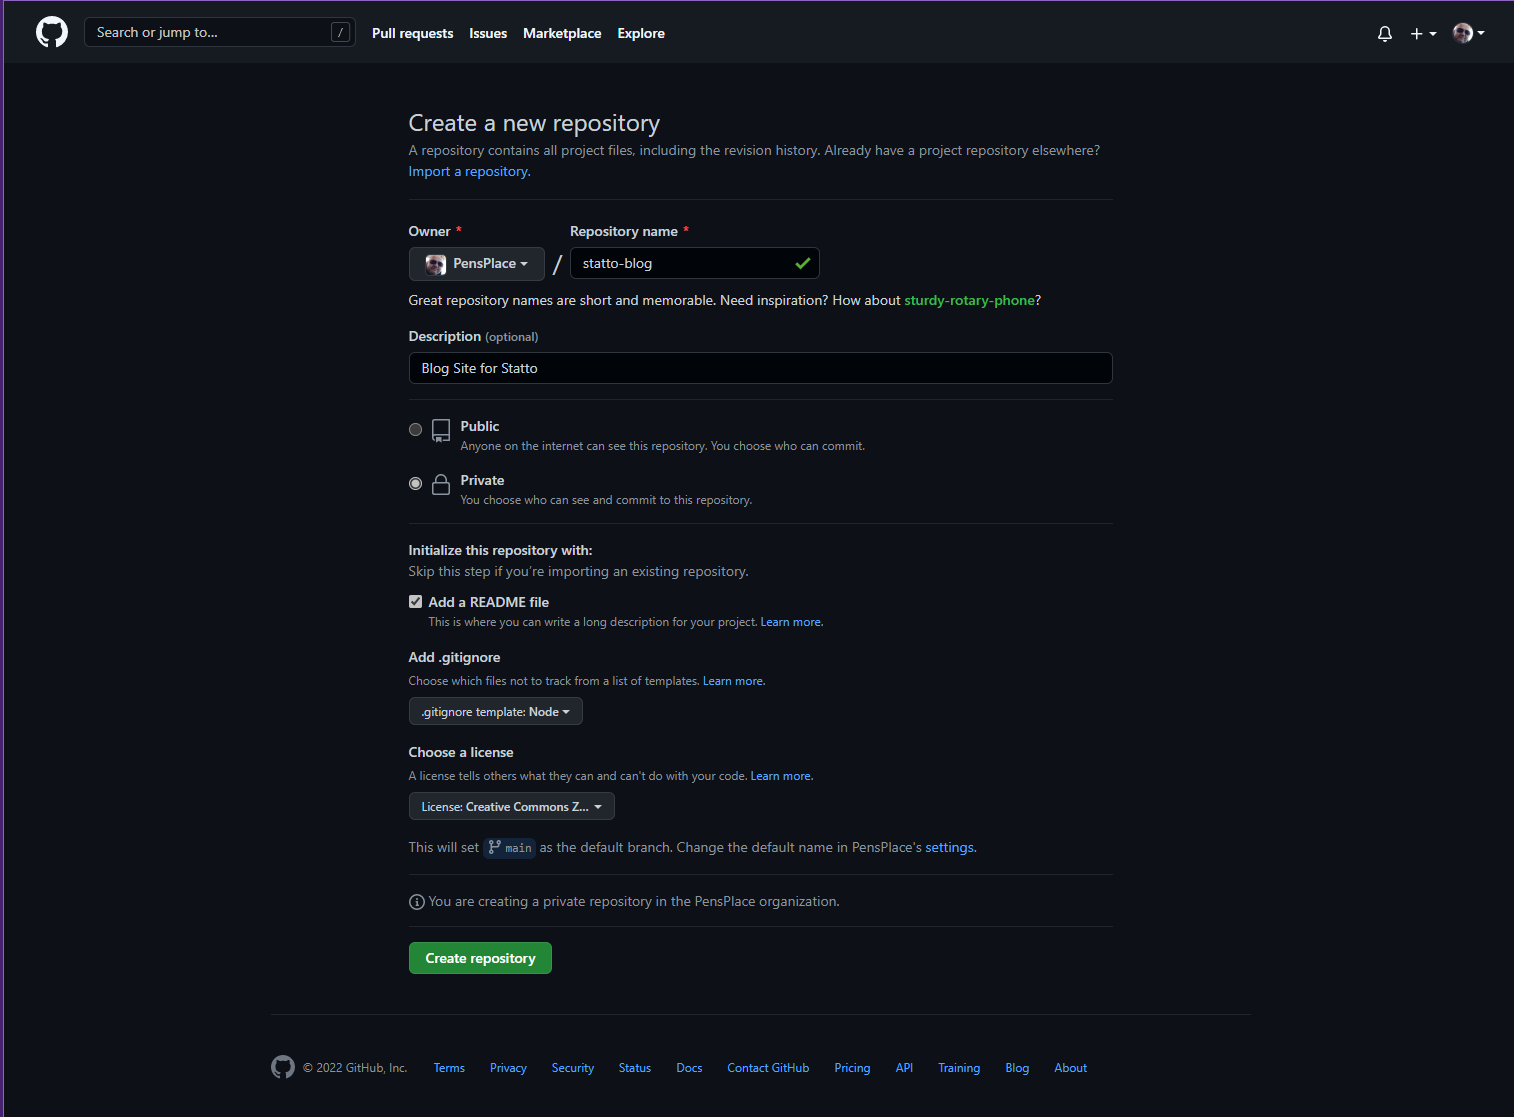
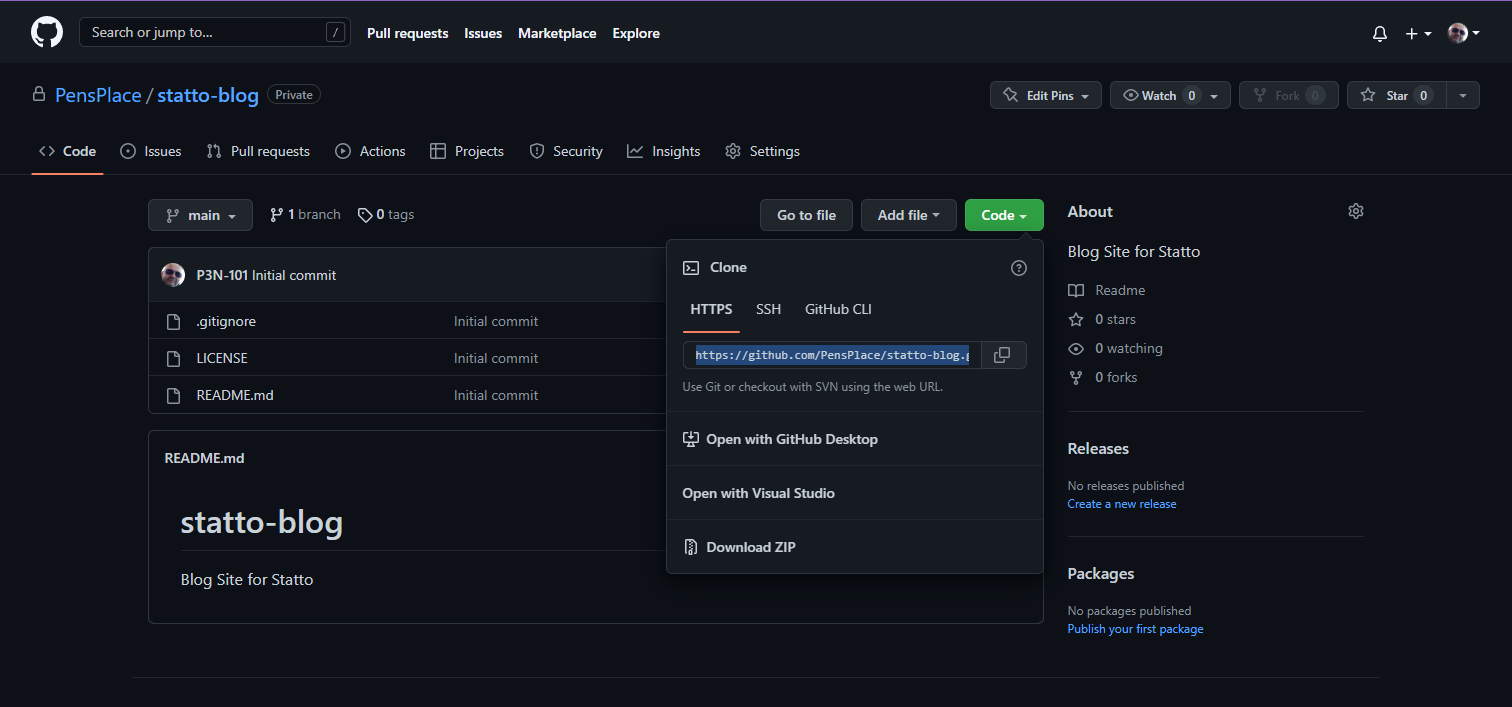
Once created click on the Code link and copy the URL.
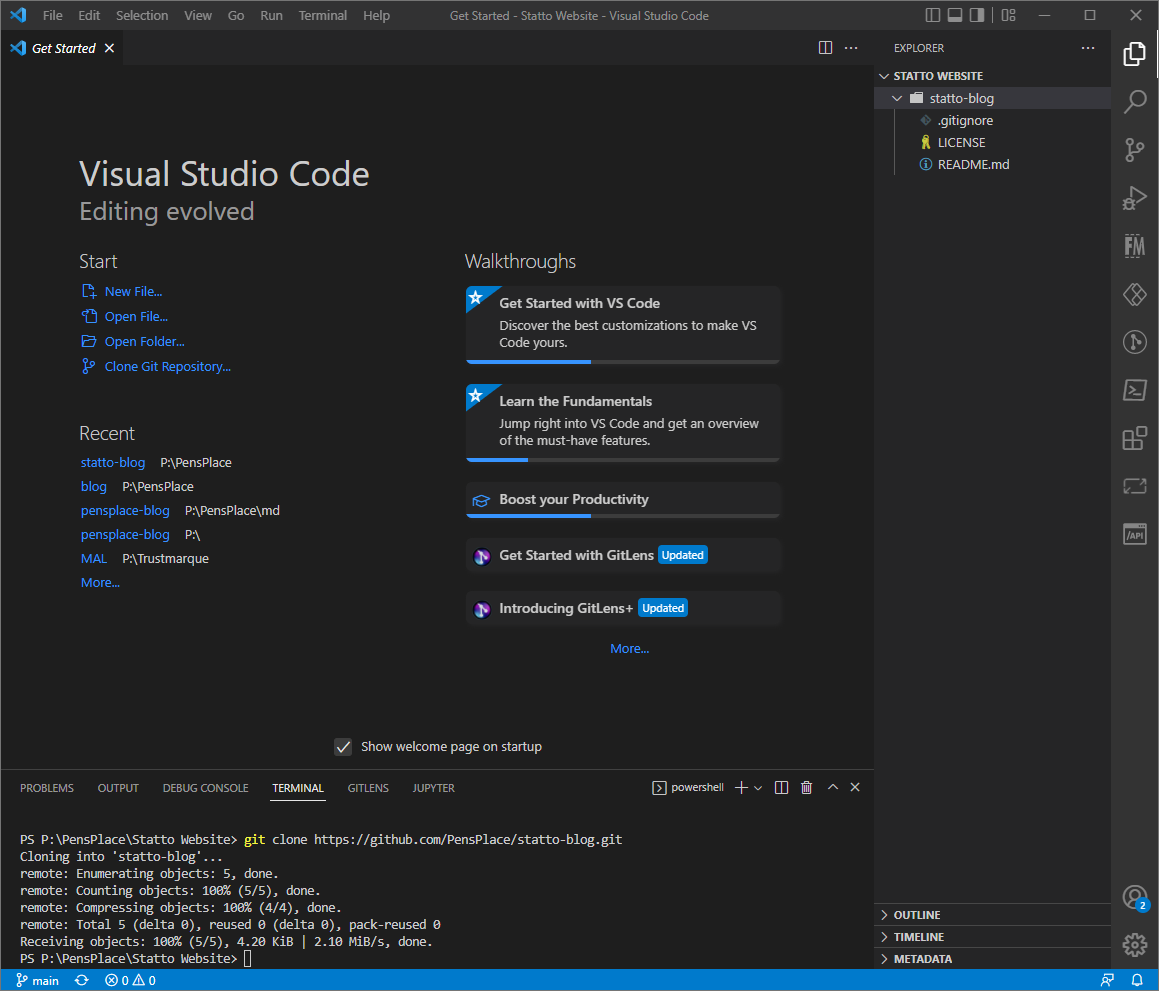
Step 2 - Clone the repository in Visual Studio Code
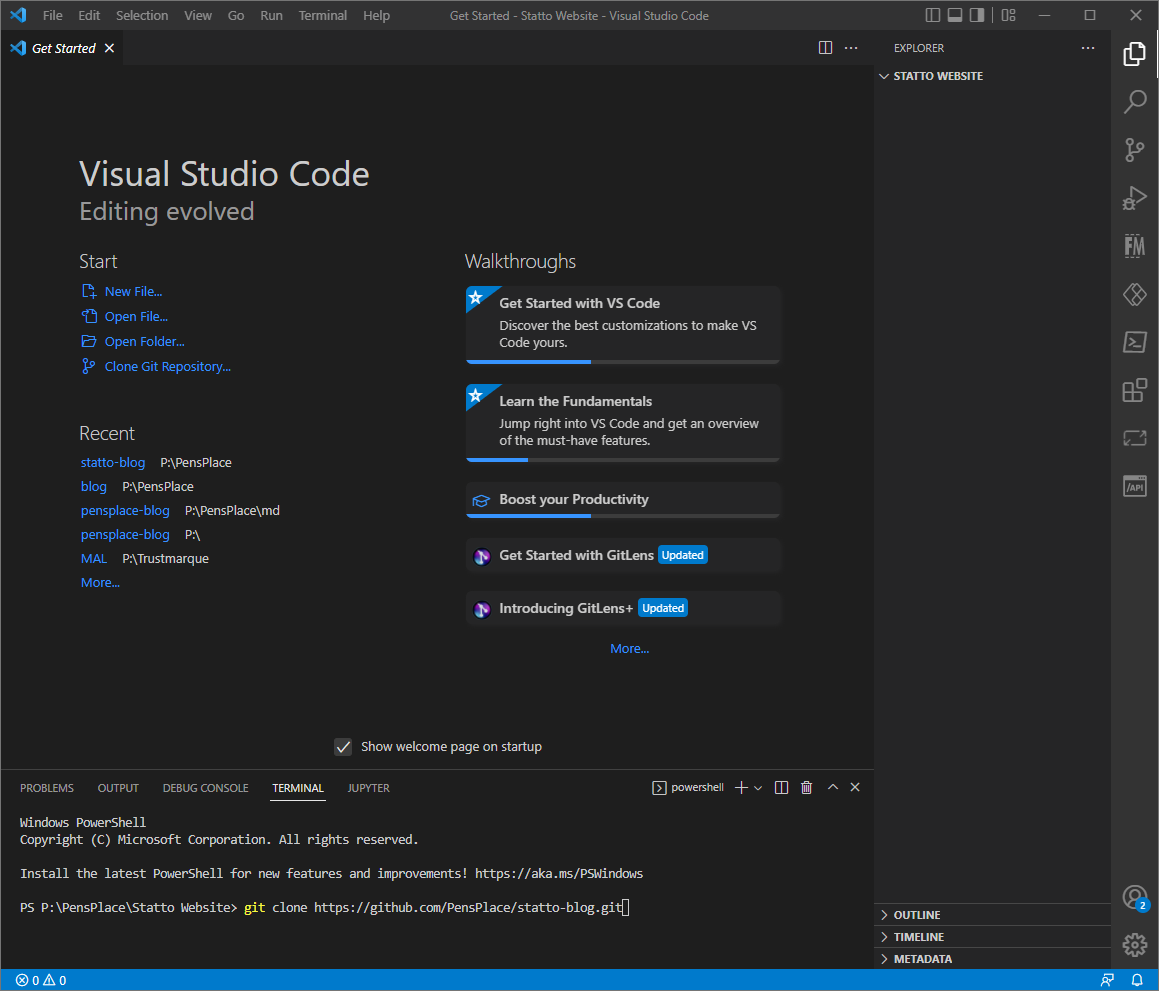 Open a blank folder and in the terminal type
 git clone https://github.com/your-repo
Step 3 - Install Hugo .
On Windows I have installed hugo via Chocolatey Package Manager, to install Chocolatey follow the guide on the Chocolately site, I installed using PowerShell Install Chocolately
choco install hugo -confirm
Step 4 - Create Hugo Site
Once Hugo is installed we can create a blank Hugo website using the following command: (replace statto-blog with your site name)
hugo new site statto-blog --force
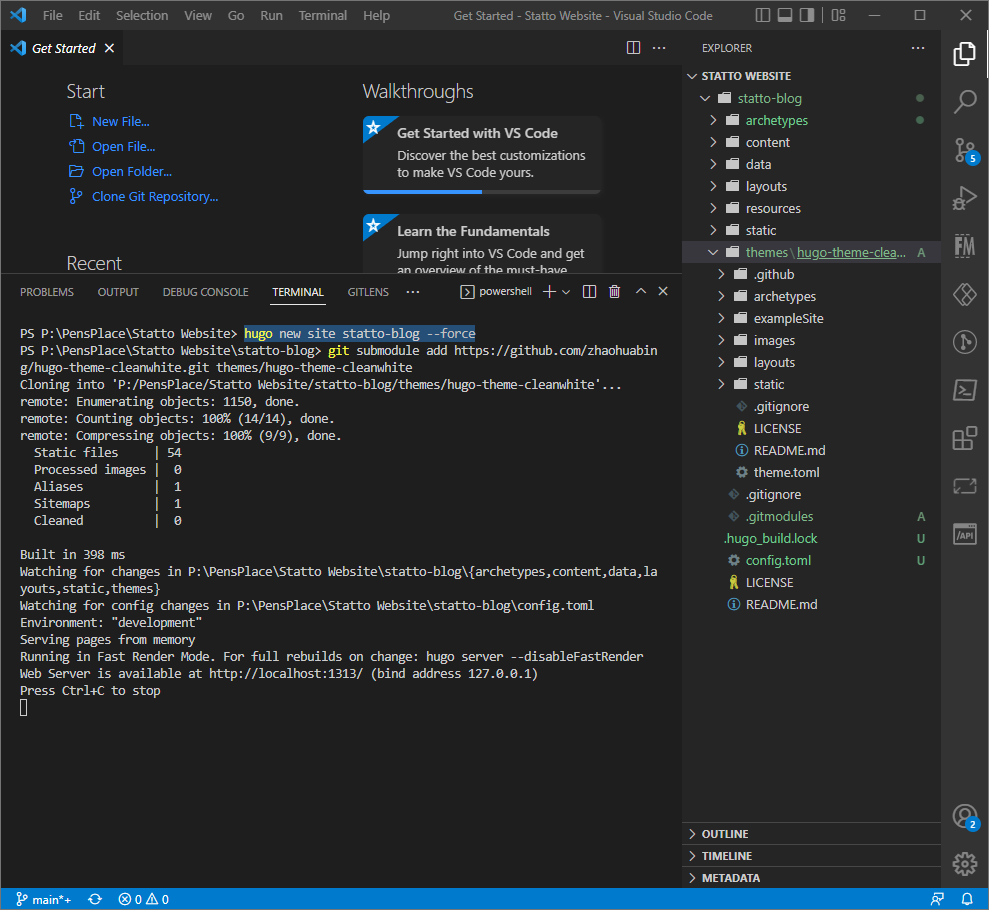
Step 5 - Install Theme
I am using the fantastic open source Clean White theme from Huabing, it’ nice simple perfect for concentrating on content, but you can use the same method with any Hugo theme.
To install the theme in the VS terminal enter cd into the folder statto-blog and enter
git submodule add https://github.com/zhaohuabing/hugo-theme-cleanwhite.git themes/hugo-theme-cleanwhite
Copy the config from the file themes/hugo-theme-cleanwhite/exampleSite/config.toml to the config.toml file in your blog root directory.
Or copy the following code to the config.toml file:
baseurl = "https://myblog.com"
title = "My Blog"
theme = "hugo-theme-cleanwhite"
languageCode = "en-us"
# Enable comments by entering your Disqus shortname
disqusShortname = ""
googleAnalytics = ""
preserveTaxonomyNames = true
paginate = 5 #frontpage pagination
hasCJKLanguage = false

[outputs]
home = ["HTML", "RSS", "Algolia"]

[params]
  header_image = "img/home-bg-jeep.jpg"
  SEOTitle = "My Blog"
  description = ""
  keyword = ""
  slogan = ""

  image_404 = "img/404-bg.jpg"
  title_404 = "Oh no something went wrong :("
  omit_categories = false

  # leancloud storage for page view counter
  page_view_conter = false
  leancloud_app_id = ""
  leancloud_app_key = ""

  # algolia site search
  algolia_search = true
  algolia_appId = ""
  algolia_indexName = ""
  algolia_apiKey = ""

  # Sidebar settings
  sidebar_about_description = "About Me"
  #sidebar_avatar = "img/avatar-zhaohuabing.jpg"      # use absolute URL, seeing it's used in both `/` and `/about/`
  sidebar_avatar = "img/me.png"      # use absolute URL, seeing it's used in both `/` and `/about/`

  featured_tags = true
  featured_condition_size = 1

  # Baidu Analytics
  ba_track_id = ""

  # We need a proxy to access Disqus api in China
  # Follow https://github.com/zhaohuabing/disqus-php-api to set up your own disqus proxy
  disqus_proxy = ""
  disqus_site = ""

  # Twikoo comments
  # Follow https://twikoo.js.org/ to set up your own env_id
  twikoo_env_id = ""

  #Enable wechat pay & alipay to allow readers send reward money if they like the articles
  reward = true
  # reward_guide = "reward guide"

  friends = true
  bookmarks = false
  about_me = true

  # Include any custom CSS and/or JS files, url or relative to /static folder
  #custom_css = ["css/lightbox.css", "https://cdnjs.cloudflare.com/ajax/libs/animate.css/3.7.2/animate.min.css", "css/main.css"]
  #custom_js = ["js/lightbox.js", "https://cdnjs.cloudflare.com/ajax/libs/jquery/3.4.1/jquery.min.js", "js/main.js"]

  [params.social]
  rss            = true
  email          = "youremail@gmail.com"
  #facebook      = "full profile url in facebook"
  #googleplus    = "full profile url in googleplus"
  #twitter       = "full profile url in twitter"
  linkedin       = "https://www.linkedin.com/in/yourlinkedinid"
  stackoverflow  = "https://stackoverflow.com/users/yourstackoverflowid"
  #instagram     = "full profile url in instagram"
  github         = "https://github.com/yourgithub"
  #wechat         = "your wechat qr code image"
  #medium        = "full profile url in medium"
  #slack         = "full workspace url in slack"
  #pinterest     = "full profile url in pinterest"
  #reddit        = "full profile url in reddit"
  #gitlab        = "full profile url in gitlab"
  #mastodon      = "full profile url in mastodon"
  #keybase       = "full profile url in keybase"
  #xing          = "https://www.xing.com/profile/yourxingid"
  #git           = "full profile url for git user"

  [[params.friend_link]]
  title = "Linda的博客"
  href =  "https://zhaozhihan.com"

  [[params.bookmark_link]]
  title =  "Martin Fowler"
  href =  "https://martinfowler.com"
  [[params.bookmark_link]]
  title = "ServiceMesher"
  href =  "http://www.servicemesher.com"
  [[params.bookmark_link]]
  title =  "Pxhere"
  href = "https://pxhere.com"
  [[params.bookmark_link]]
  title = "unsplash"
  href = "https://unsplash.com"

  [[params.addtional_menus]]
  title =  "BOOKS"
  href =  "/top/books/"
  [[params.addtional_menus]]
  title =  "ARCHIVE"
  href =  "/top/archive/"
  [[params.addtional_menus]]
  title =  "ABOUT"
  href =  "/top/about/"

[outputFormats.Algolia]
baseName = "algolia"
isPlainText = true
mediaType = "application/json"
notAlternative = true

[params.algolia]
vars = ["title", "summary", "date", "publishdate", "expirydate", "permalink"]
params = ["categories", "tags"]

[markup]
  [markup.tableOfContents]
    endLevel = 2
    startLevel = 1
  [markup.highlight]
    style = "dracula"
Now we can test everthing has worked by testing the site locally using the following command:
hugo serve
This will start the Hugo local server and open your site at localhost:1313

To stop the local server use ctrl+c
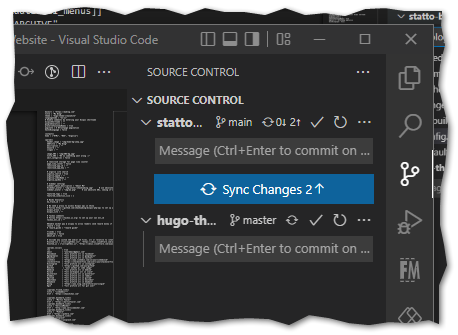
Step 6 - Commit our Hugo local site to Github
In VS Code, click on the Source Code icon on the rail, this will show our changes compared to the repository.
To commit the changes, enter a commit message in click on the tick icon.

To complete the commit and sync the local files to the repository click on the Sync Changes button.
We now have the first part of the setup complete, in the next article I will explore how to configure the Hugo site and create content.
comments powered by Disqus
If you liked this post and would like to read more of my posts.
Subscribe