

Introduction
A new modern control has appeared in Power Apps authoring version 3.24051.23 (16/05/2024) called Avatar. The new Avatar control in Canvas Apps provides the ability to show a users image and presence, however, the control is static and not connected to your presence.
Here what it can provide with a little bit of help:
- Real-Time Interaction: It allows users to see others’ availability, aiding in immediate communication and teamwork.
- Enhanced User Experience: Presence indicators make apps more interactive and aware of user context, like showing if a team member is online.
- Coordinated Actions: Users can coordinate chats or meetings more effectively by knowing when others are available.
- Visibility: In shared environments, presence indicators clarify who else is working with the same data, improving collaboration.
This feature is inspired by Microsoft 365 and Power Apps Studio’s co-authoring capabilities and uses the new Avatar modern control for implementation.
Step 1 - Create a App Registration for accessing the Graph
First up we need to create an Entra App Registration so we can talk to the Microsoft Graph to return a users presence.
Go to entra.microsoft.com –> Applications –> App Registrations and create new.
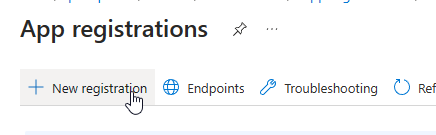
Give you app reg a name, in this example I have just called it Presence and click Register
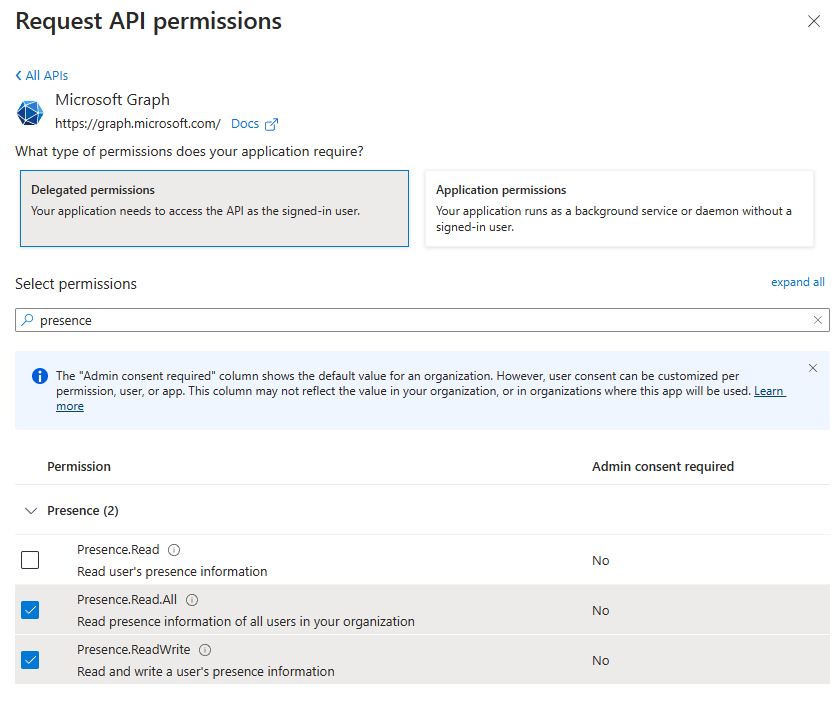
Next goto API Permissions and add the delegated permissions as shown:
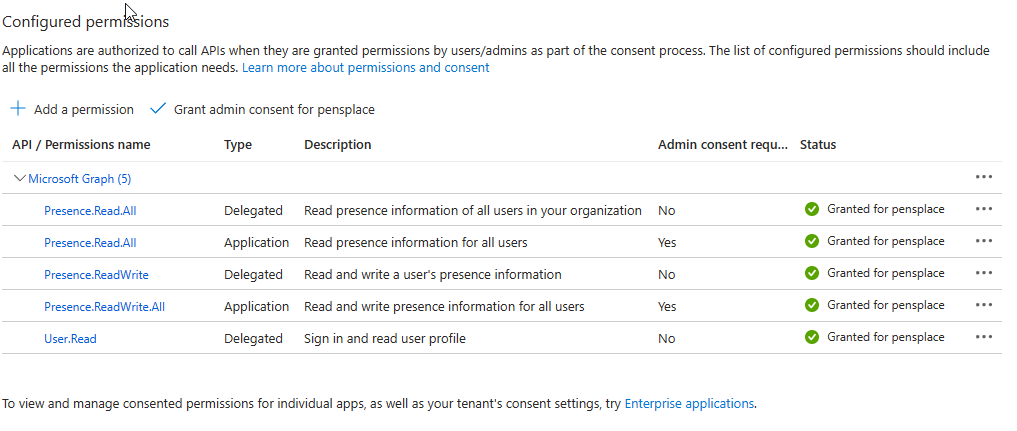
add the same Application permissions and then grant admin consent, your permissions should look like the following:
Next goto Certificates and secrets and create a new Client Secret, give the secret a description and choose the length of expiration and click create.
Copy the Value of the secret we will need that in our custom connector and also copy the client id from from the overview page.
Step 2 - Create and test the Custom Connector
Goto make.powerautomate.com, navigate to the correct Environment and create a new custom connector.
General Tab
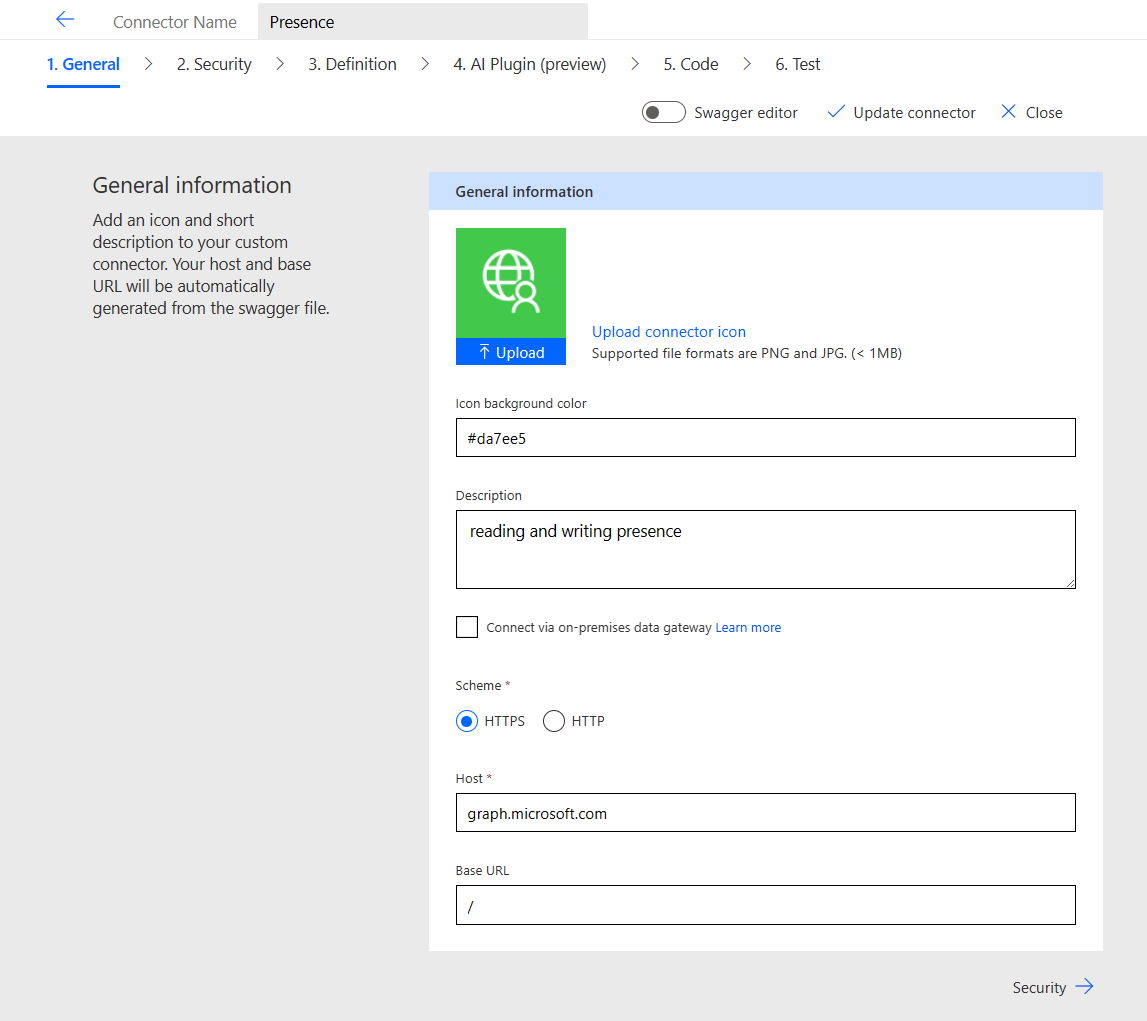
Update the host to graph.microsoft.com and click next:
Security Tab
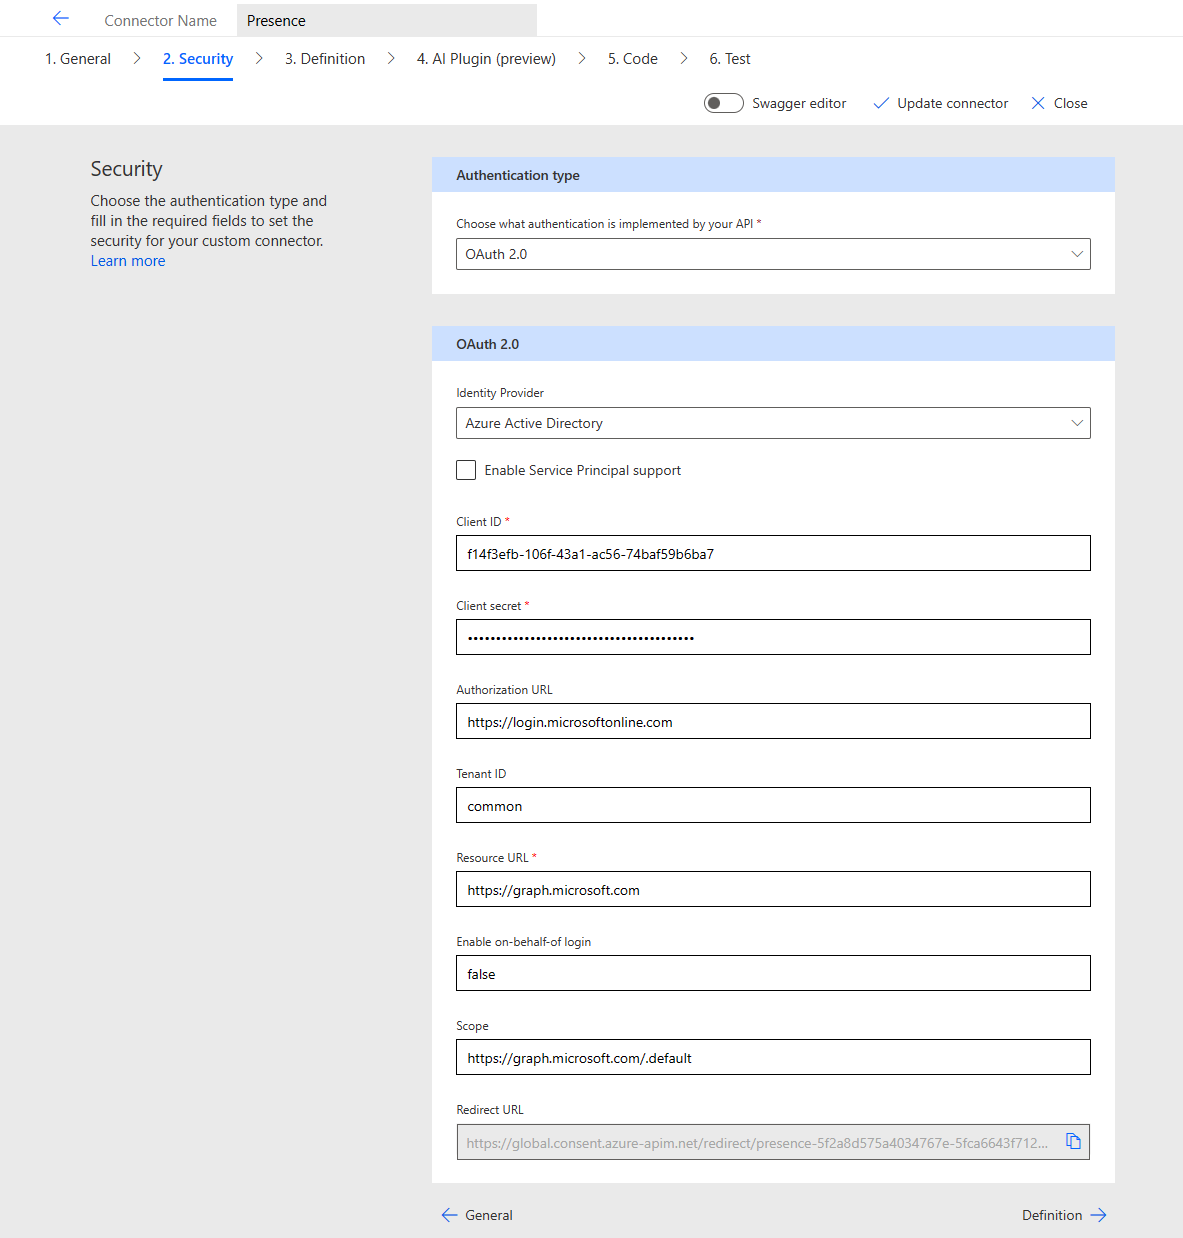
Select OAuth 2.0 and select Azure Active Director as the Identity provider.
Add your Client ID and Secret.
For the authoization URL use https://login.microsoft.com
Tenant ID leave as Common.
Resource URL add https://graph.microsoft.com
Scope add https://graph.microsoft.com/.default
Now Save or Update the Connector to create the Redirect URL we will need in the next step so once saved copy this URL.
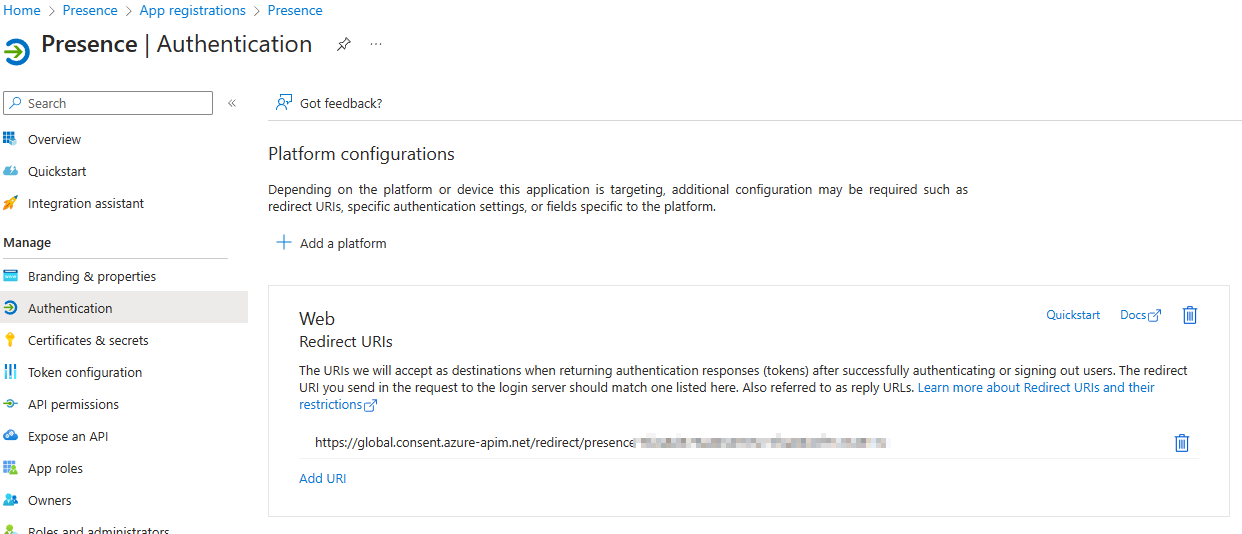
Update App Registration with the Return URL
Go back to your app registrion in Entra and on the overview page under Redirect URIs click Add a redirect URI click on Add a platform and choose Web
Enter the redirect URL from the custom connector and click Configure
Definition Tab
In this example we will create a single action to get a user’s presence.
getUserPresence
Add a new Action: Under General add:
| Column | Value |
|---|---|
| Summary | GetUserPresence |
| Operation ID | getUserPresence |
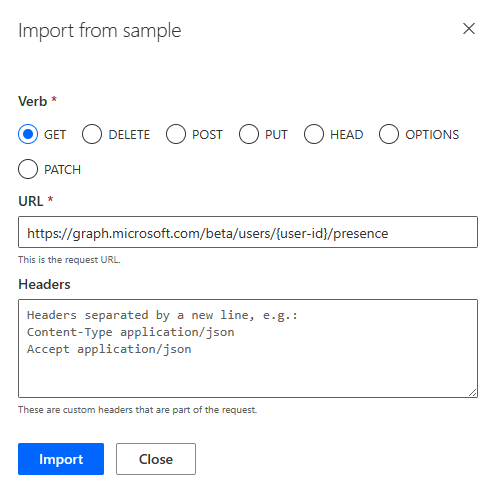
Under Request click Import from sample,
| Column | Value |
|---|---|
| Verb | Get |
| URL | https://graph.microsoft.com/beta/users/{user-id}/presence |
|
Click import.
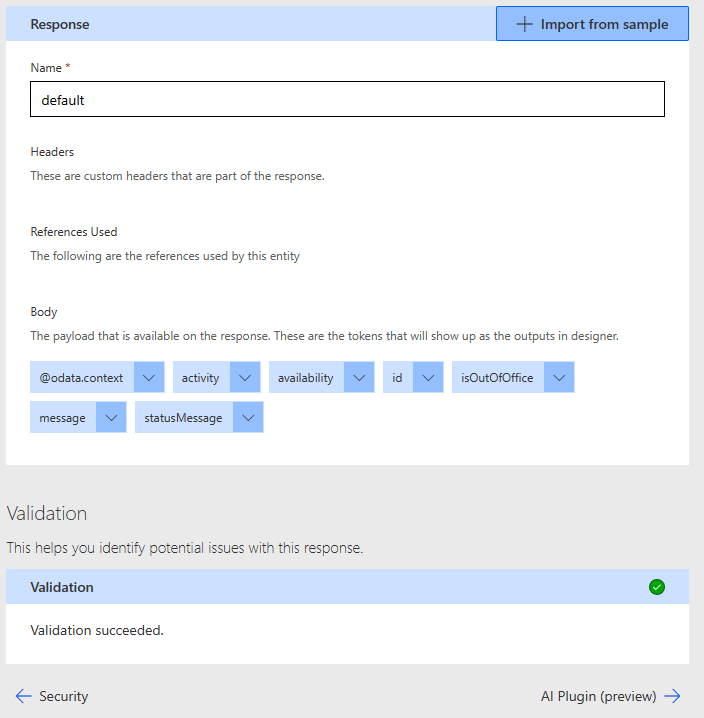
Under Response, click on Default and then Import from sample and add the following
{
  "@odata.context": "https://graph.microsoft.com/beta/$metadata#users('00000000-0000-0000-0000-000000000000')/presence/$entity",
  "id": "00000000-0000-0000-0000-000000000000",
  "availability": "Available",
  "activity": "Available",
  "statusMessage": null,
  "outOfOfficeSettings": {
    "message": null,
    "isOutOfOffice": false
  }
}
Click Import and Update the Connector.
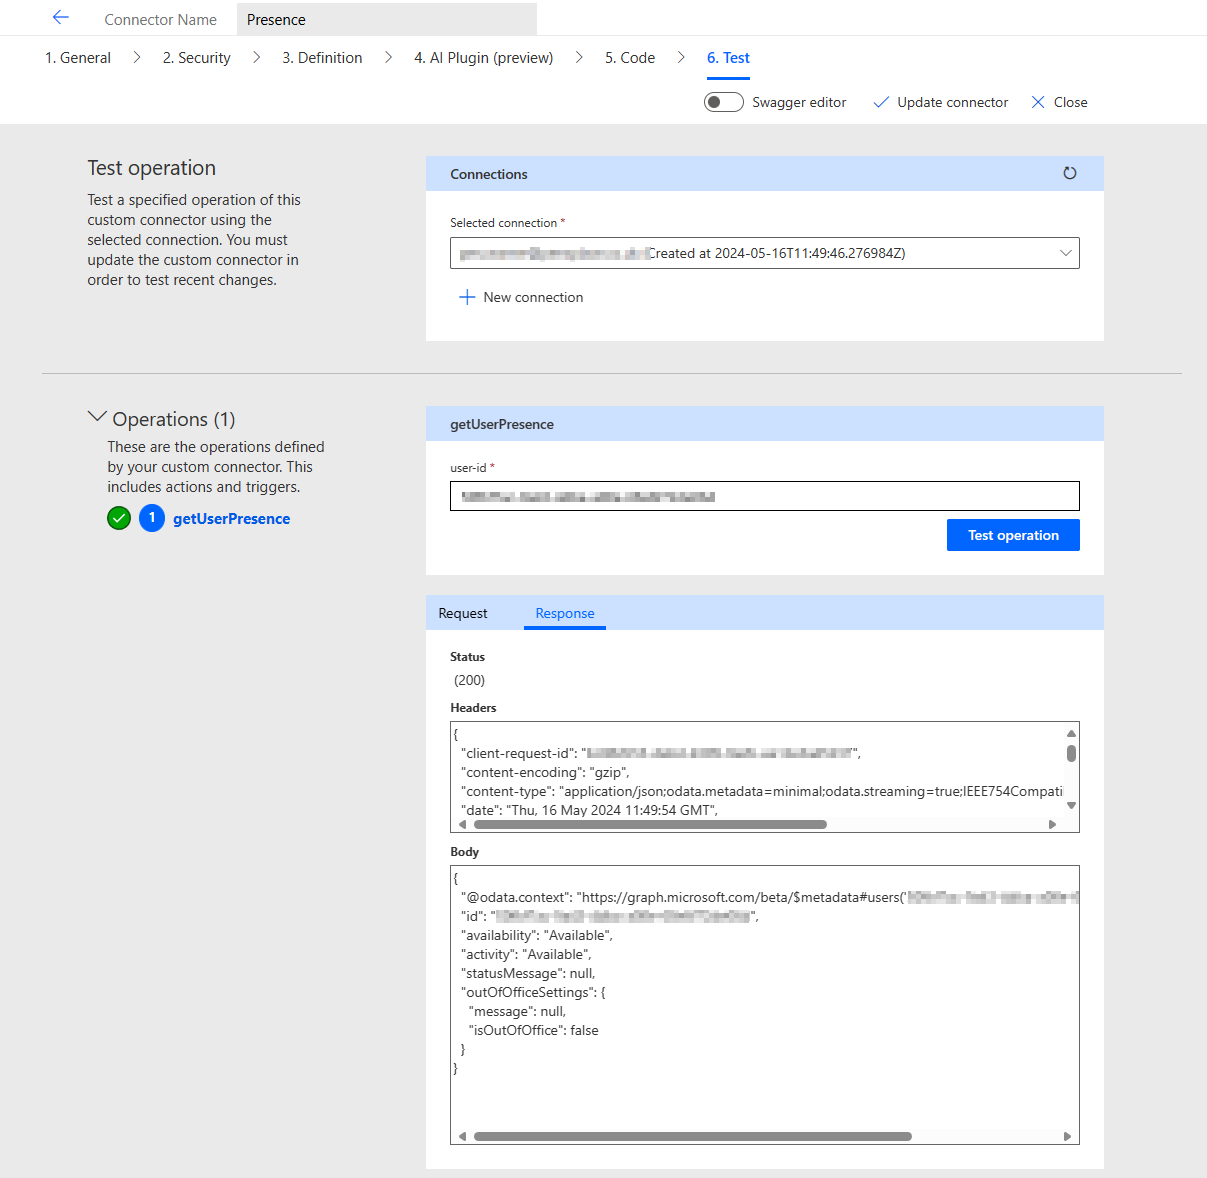
Go to 6.Test
Get your user Id from Entra. Create a Connection and add the Id and click Test Operation
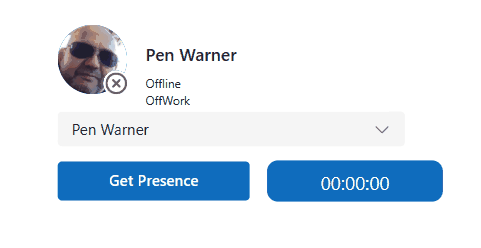
Step 3 - Create the Canvas App to show Presence in the Avatar control
comments powered by Disqus
If you liked this post and would like to read more of my posts.
Subscribe